
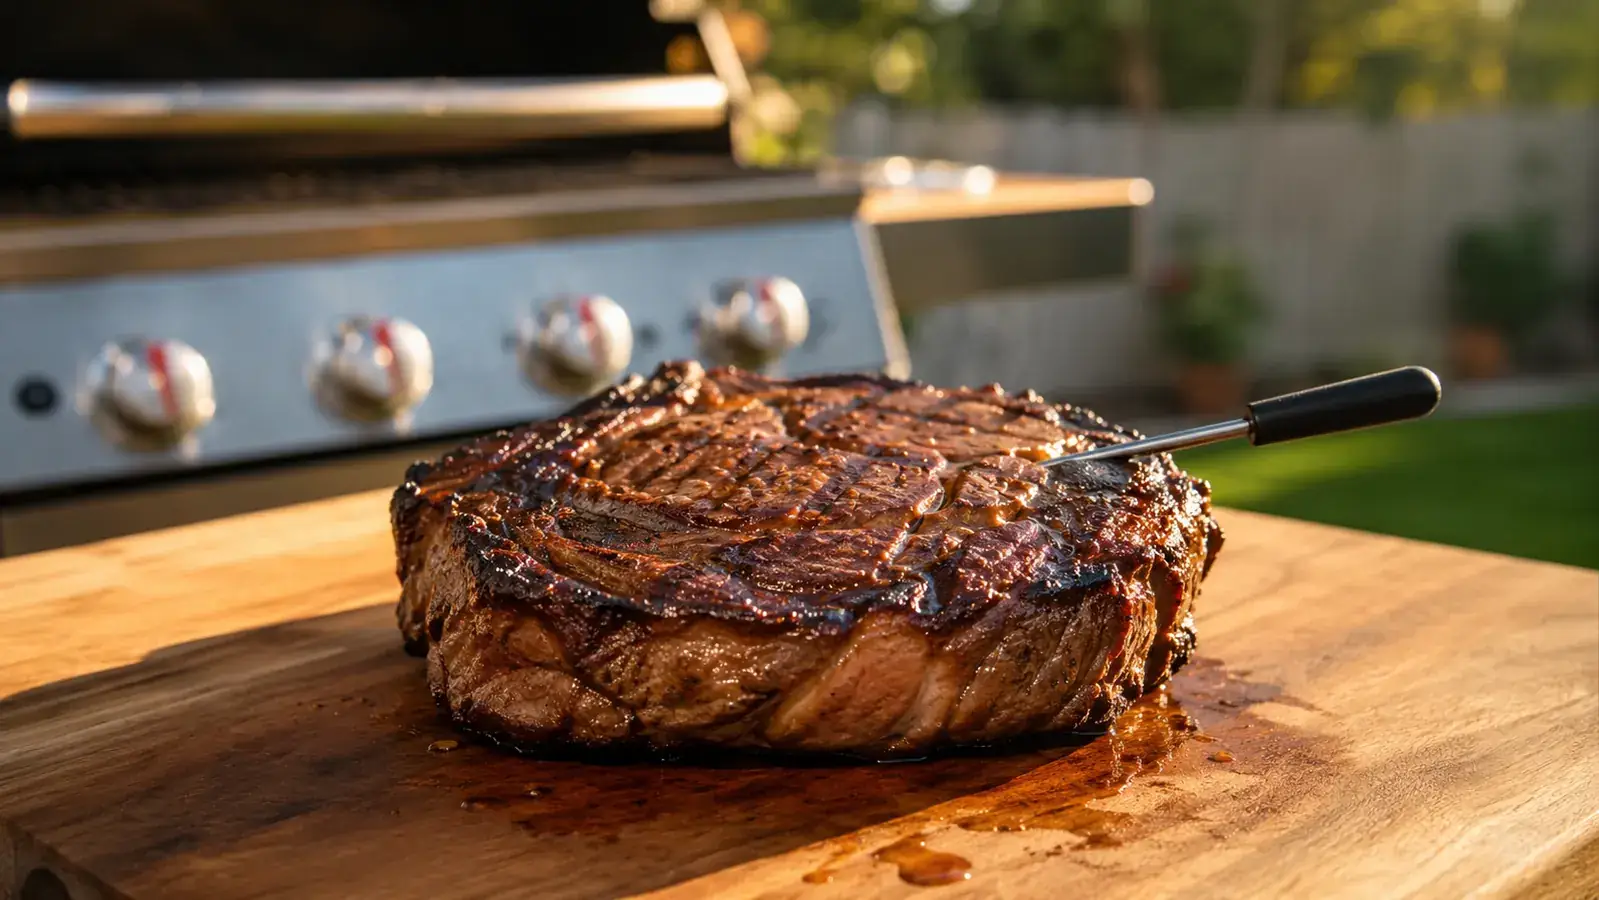
For about two years I grilled steak the way my dad taught me: press it with a finger and guess. Firm meant well-done, squishy meant rare, and somewhere in between meant I was cutting a slit into the middle to peek, which let all the juice run out onto the cutting board. I ruined more ribeyes that way than I want to admit, usually on nights when I had people over and couldn't exactly redo it. One Fourth of July I overcooked four ribeyes back to back in front of my in-laws and just laughed it off, but it stuck with me enough that I started actually looking into a better way the following week.
What actually fixed it wasn't a better cut of meat or a hotter grill. It was a small habit change: using an actual digital meat thermometer instead of my thumb. I've been running a TempPro TP17 dual-probe thermometer for the last year and a half, and it's the one grill tool that moved from 'nice to have' to 'I check for it before I check for propane.' Worth noting up front, this is the same TempPro line that used to sell under the ThermoPro name, just rebranded, so if you've seen either name on a box at the store, it's the same family of thermometer.
Here's the exact five-step process I use every time, from picking the cut in the meat case to slicing it on the cutting board. None of it is complicated. It's mostly about knowing where to put the probe and what number to pull at, which is exactly the part guessing by touch can't tell you.
The steak thermometer that ended the guessing game in my kitchen
This is the dual-probe digital thermometer I use for every steak, chicken thigh, and holiday roast. Two probes mean you can monitor grill temp and meat temp at the same time, and the alarm tells you when to pull before you're standing over it the whole time.
Amazon Check Today's Price on Amazon →Step 1: Pick a cut with some thickness and let it come to room temperature
A thermometer can only do its job if there's enough meat to actually read. Anything under an inch thick cooks so fast that the temperature swings by ten degrees in the time it takes to lift the probe out and check it again. I look for ribeyes or New York strips at least an inch and a quarter thick, closer to an inch and a half if I'm buying for four people and want visible pink at the center for everyone, not just the middle cuts that happen to sit thickest on the plate.
I pull the steaks out of the fridge 30 to 40 minutes before they hit the grill. Cold steak straight from the fridge cooks unevenly, gray and tough near the surface before the center catches up, and that uneven cook is exactly what makes finger-testing so unreliable in the first place. Letting it sit on the counter, salted, gets the whole cut closer to the same starting temperature so the thermometer reading in step 3 actually means something instead of just describing whatever's happening at the surface.
I also pat the steaks dry with a paper towel right before they go on, since a wet surface steams instead of sears. This part has nothing to do with the thermometer directly, but a good sear is what gives the probe an accurate baseline to work from once the steak moves into the finishing zone in step 2.
Step 2: Build a two-zone fire before the steak ever touches the grate
One hot zone and one cooler zone. On my charcoal kettle that means banking the coals to one side. On a gas grill it means leaving one or two burners off. This matters for the thermometer method because you're going to sear hard on the hot side, then move the steak to the cooler side to finish climbing to temperature slowly, which is where the second probe on the TP17 earns its keep.
I clip the second probe to the grill grate on the cooler side and let it read ambient grill temperature the whole time the steak is cooking. I'm aiming for somewhere around 300 to 325 degrees on that side. Too hot and the outside overcooks before the center catches up, too cool and you lose the last bit of char you built during the sear and the steak just sits there without climbing.
This two-zone setup is the difference between a steak with a deep brown crust and an evenly cooked center, versus one that's either charred outside and raw in the middle, or gray all the way through with no crust at all. Both probes running at once is what makes it possible to manage that balance without constantly lifting the lid.
Step 3: Insert the meat probe the right way, not just anywhere
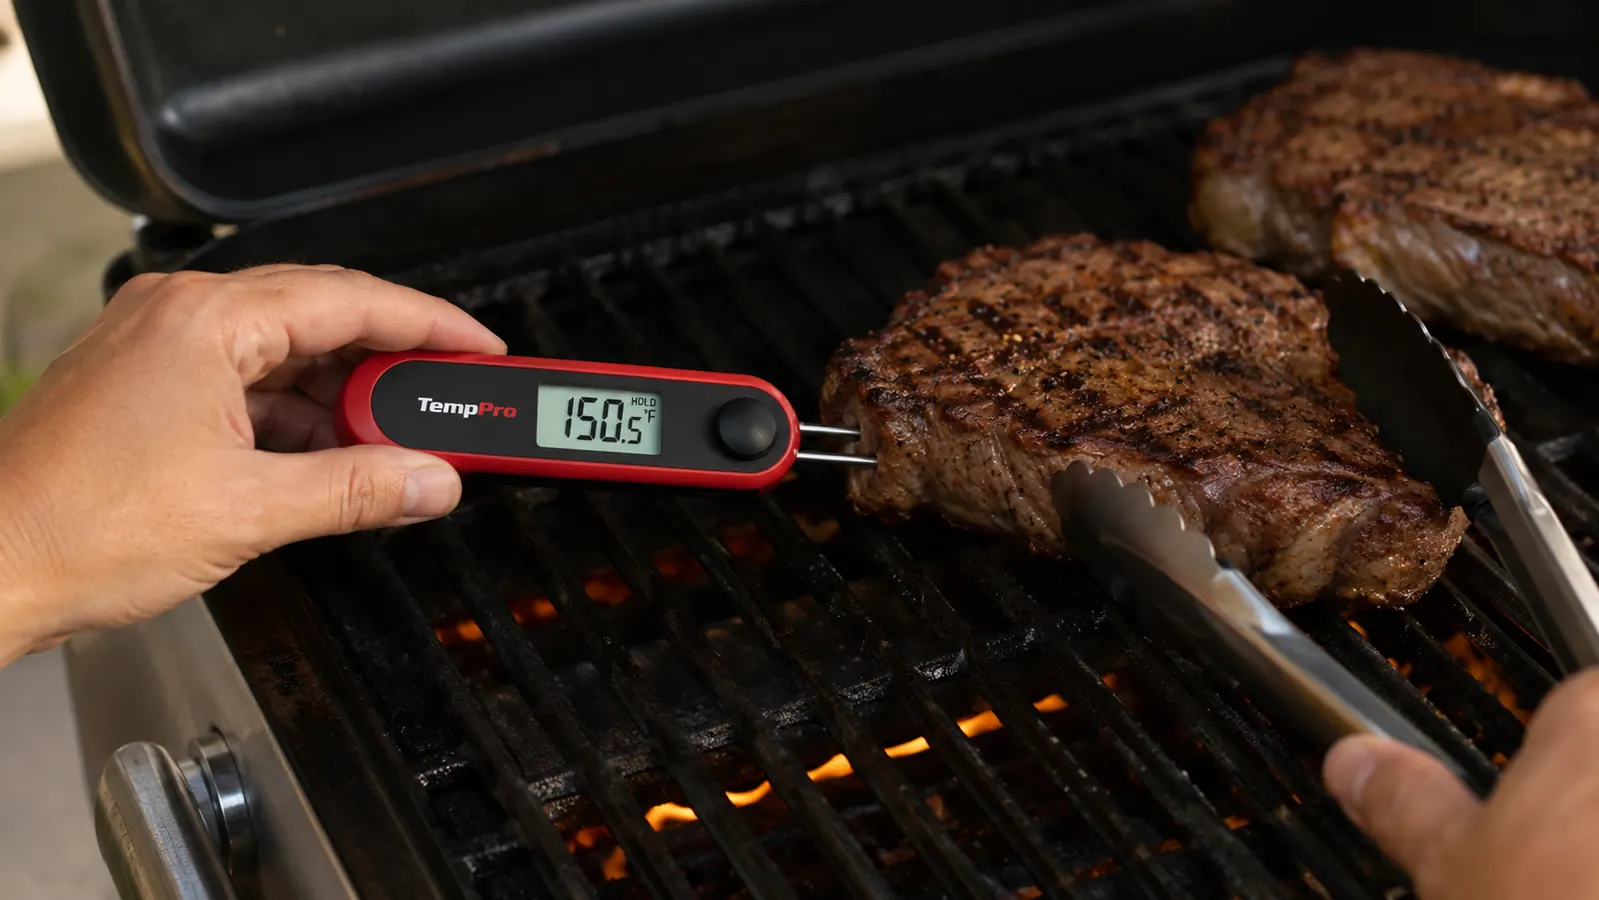
This is the step people get wrong most, myself included for the first few months I owned a thermometer. You want the probe tip sitting in the thickest part of the steak, inserted from the side, running roughly parallel to the grate, not straight down through the top. Straight down usually means the tip ends up too close to the grill surface, which reads hot and tells you the steak is done before it actually is.
I insert the probe once the steak has already been seared on both sides and moved to the cooler zone. Searing first means I'm not fumbling with a wire while flipping over the hottest part of the fire, and it means the probe stays put for the slower finish instead of getting knocked around during flips. For a thick ribeye, I aim for the very center of the muscle, avoiding any large pockets of fat, since fat heats differently than muscle and will throw the reading off.
If you're cooking two or three steaks at once and only have one meat probe, I check the thickest one first, then rotate it through the others near the end. It's not as convenient as having a probe in every steak, but it's still leagues more accurate than pressing each one with a finger and hoping they're all cooking at the same rate, which they rarely are once you've got different steaks at slightly different thicknesses on the same grate.
Step 4: Pull at the right temperature, not the temperature you actually want
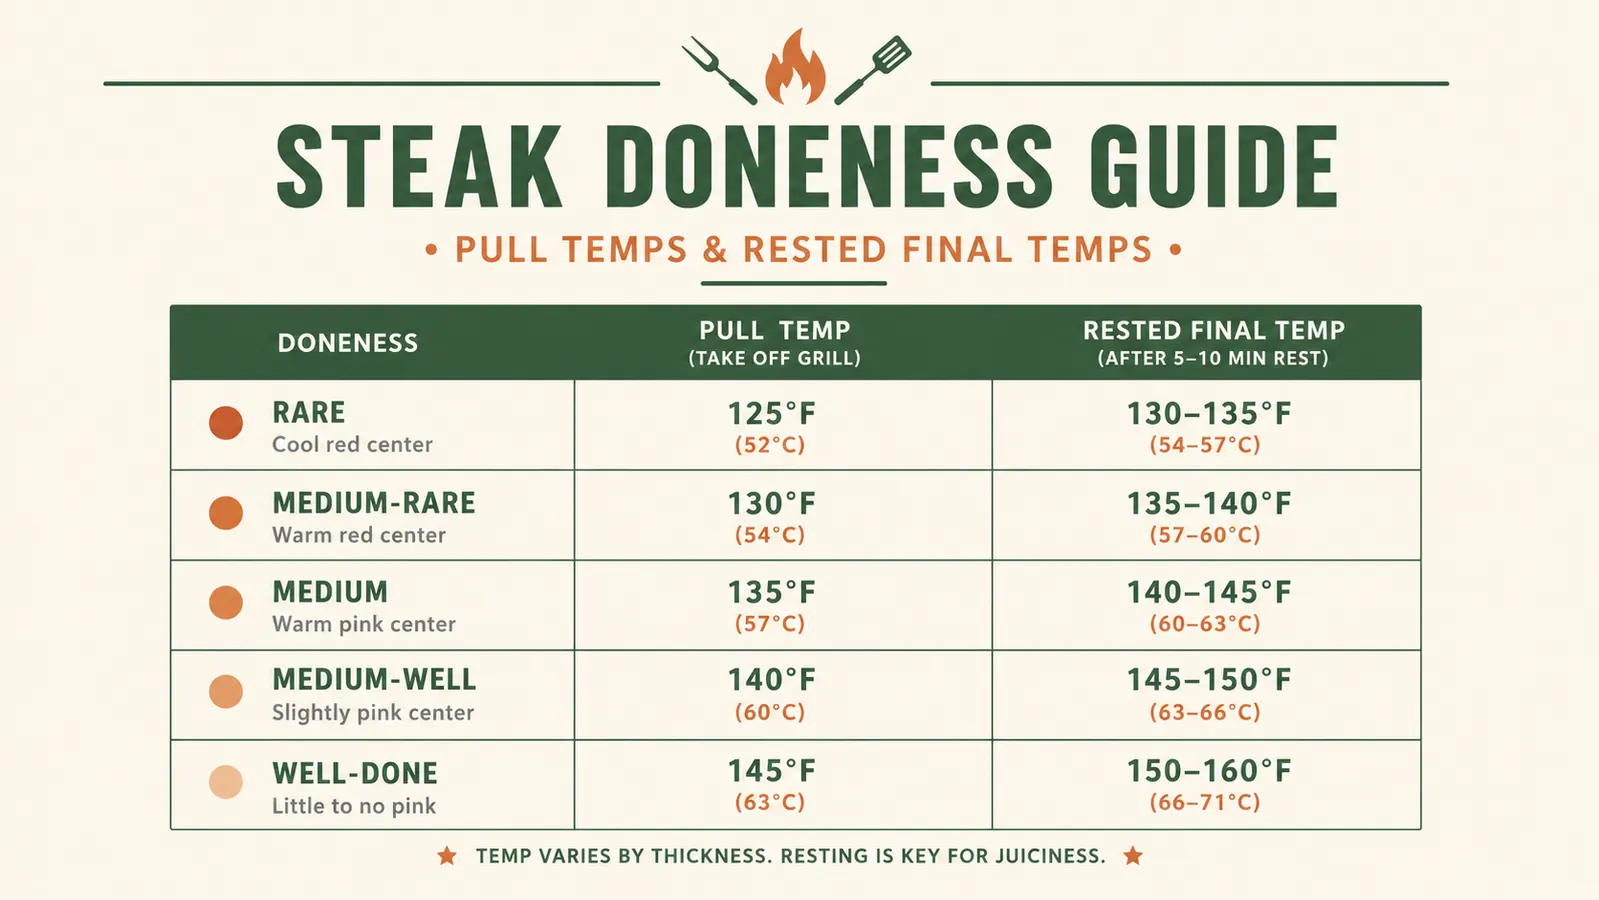
This tripped me up longer than anything else. A steak keeps cooking after it comes off the grill, usually climbing another 5 to 8 degrees while it rests, a phenomenon called carryover cooking. If you pull at your target temperature, you'll overshoot it every time and wonder why your 'medium-rare' keeps coming out medium, or why a steak you were sure you'd nailed turns out closer to well-done by the time you cut into it.
I pull ribeyes at 127 to 130 degrees for a rested final temperature around 135, which is medium-rare with a warm red center. For medium, I pull around 137 to 140 for a rested finish near 145. The TP17's alarm is set to the pull temperature, not the final one, and once you set that alarm you stop hovering over the grill checking every ninety seconds, which was honestly my worst habit before I owned one. I can step away, refill drinks, or set the table, and the alarm tells me when it's time to go back outside.
Step 5: Rest it, recheck it, then slice against the grain
Five minutes minimum, tented loosely with foil, off the heat entirely. I use this window to check the probe reading one more time to confirm it climbed into the range I wanted, and to plate the sides so the steak isn't sitting around getting cold while I chop parsley I forgot about earlier.
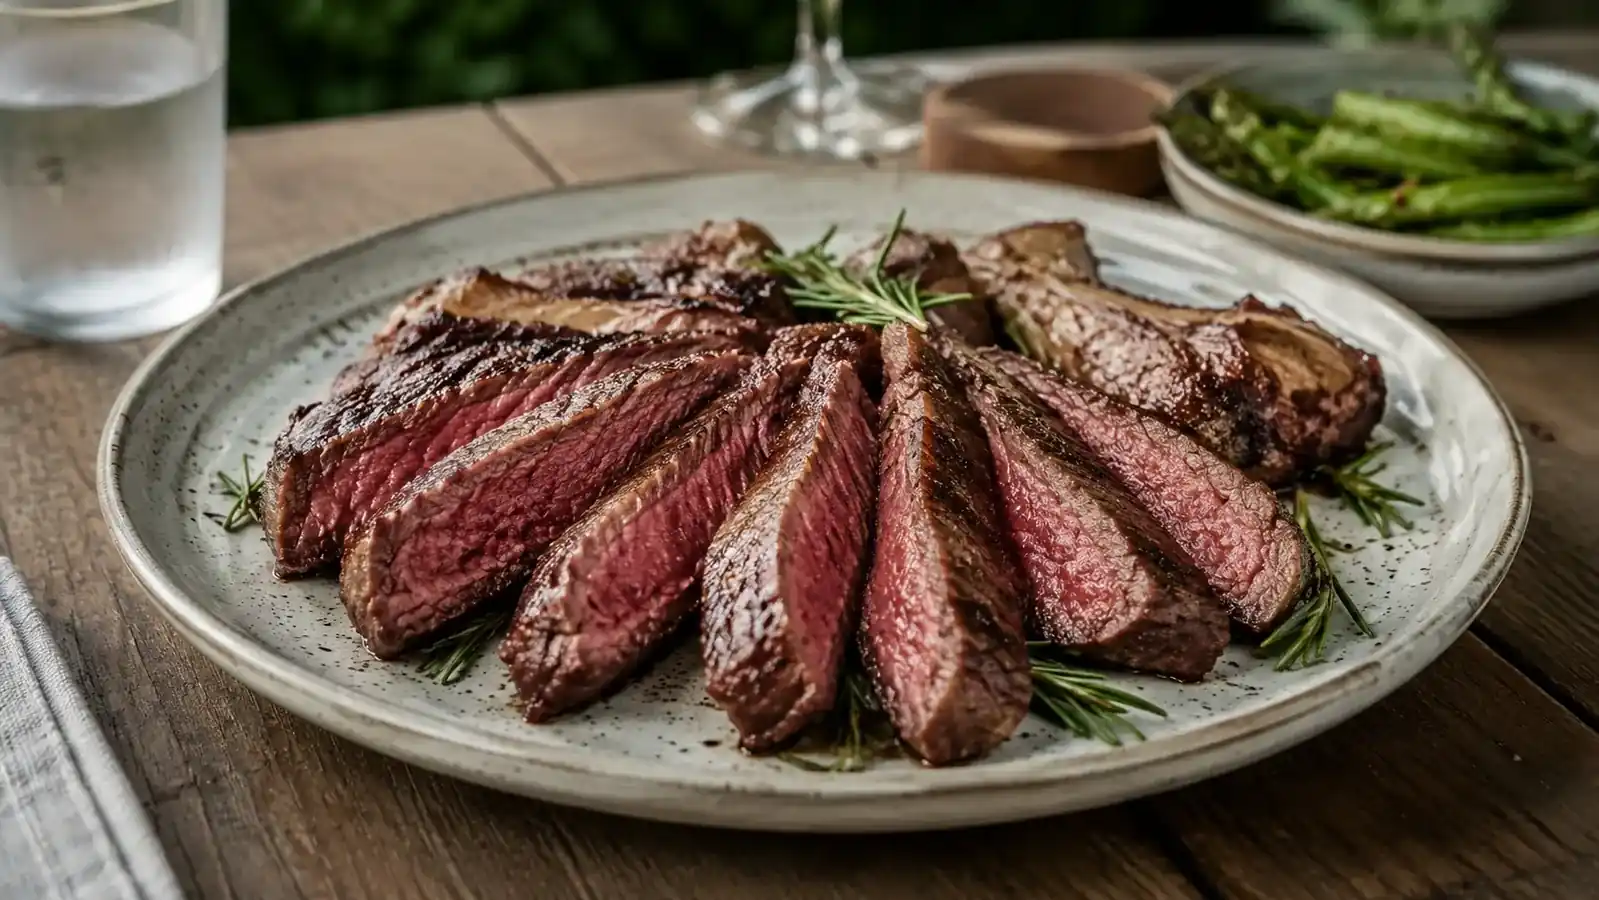
When I slice, I cut against the grain, meaning perpendicular to the visible muscle fibers running through the meat. That single habit, combined with hitting the right internal temperature, is what makes the difference between a steak that's tender edge to edge and one that's tough no matter how well you cooked it. Between the thermometer and the slicing direction, this is the whole method. Nothing fancy, just repeatable, and it works the same way whether it's a Tuesday night ribeye or a strip steak for six people on the Fourth of July.
I stopped thinking of the thermometer as a gadget and started thinking of it as the thing that lets me actually talk to my guests instead of standing over the grill pressing steaks with my finger every two minutes.
What Else Helps
A couple of small things made this method more consistent once I had the thermometer in hand. I keep a printed doneness chart taped inside my grill's side cabinet, since I never remember the exact pull numbers off the top of my head, especially for cuts I don't grill often like pork chops or thick-cut chicken breasts. I also learned to calibrate the thermometer once a season by testing it in ice water, which should read 32 degrees. Mine drifted about two degrees off after a year of use, which doesn't sound like much until you're trying to hit a narrow window like medium-rare.
The other habit worth building is writing down what actually worked. After a few cookouts of jotting the pull temp and rest time next to whatever cut I used, I stopped needing the chart at all for the cuts I grill most. The thermometer is what gets you accurate readings, but it's the repetition of checking and noting the numbers that turns it into a method you don't have to think about anymore.
One last thing that matters more than it sounds like it should: keep the probe cable and the base unit somewhere you'll actually grab it, not buried in a drawer behind three other gadgets you tried once. I keep mine hanging just inside the back door on a small hook, wiped down and coiled, so there's zero excuse to skip it on a weeknight when I'm tempted to just wing it. A thermometer that's annoying to dig out is a thermometer that quietly turns back into a finger press, and I've learned that the hard way with steaks that came out fine but could have been better.
Grab the thermometer before your next cookout, not during it
If you're still going by touch or by cutting into the steak to check, the TempPro TP17 solves that in one purchase. Dual probes, backlit display for grilling after dark, and a timer mode that means you stop guessing and start knowing.
Amazon Check Today's Price on Amazon →